Organizing Your Collection with Custom Coin Trays and Dividers

A single high-grade arcade token can lose significant value if it sits in a pile of unorganized metal where it's subject to constant friction and scratches. Most collectors underestimate how much physical contact between items degrades a collection's grade. This post explores how to implement custom coin trays and dividers to prevent physical damage, improve accessibility, and maintain the aesthetic integrity of your gaming collectibles. We'll look at material types, sizing, and the specific ways to prevent surface wear.
Why Should You Use Custom Coin Trays for Arcade Tokens?
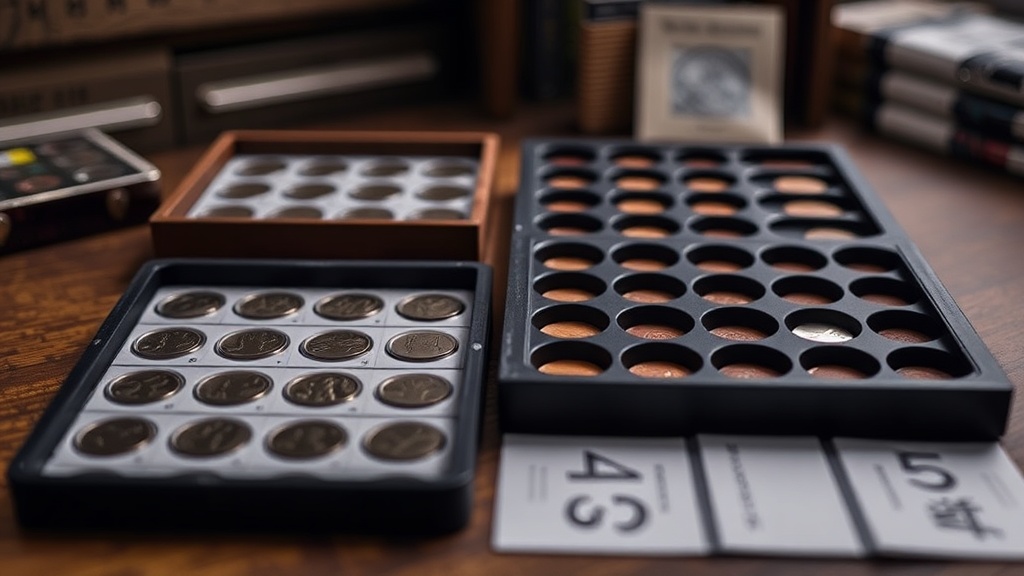
Custom coin trays provide a structured environment that prevents metal-on-metal contact and reduces the risk of scratches. Standard storage bins often lead to "clumping," where heavy tokens settle at the bottom and scratch the faces of those on top. Using dedicated trays ensures each piece has its own designated space.
When you're dealing with heavy brass or copper-plated tokens, weight is a factor. If you toss them into a standard plastic box, the sheer weight of the collection can cause the bottom layer to undergo micro-abrasions. This isn't just about looks; it's about the actual market value of the item. A "Mint State" token becomes "Very Good" if the surface is scuffed by its neighbor. It's a frustrating way to lose money on a collection.
Custom trays also allow for better visual identification. You don't want to be digging through a jar of tokens to find that one specific 1970s novelty piece. A tray with individual slots or dividers lets you see your entire inventory at a glance. It turns a pile of metal into a curated gallery.
If you want to see how much value is actually at stake, check out why metal oxidation changes token value. While oxidation is a chemical process, physical scratches act as a catalyst for much faster aging. A scratched surface is a vulnerable surface.
Common Tray Materials Compared
| Material | Pros | Cons | Best For |
|---|---|---|---|
| Acrylic/Lucite | High visibility, looks professional, very clear. | Can scratch easily if not handled well. | Display-heavy collections. |
| Velvet-Lined Wood | Premium feel, prevents heavy sliding. | Harder to see through, more expensive. | High-value heirloom pieces. |
| Silicone Inserts | Extremely shock absorbent, easy to clean. | Less "premium" aesthetic. | Transporting collections. |
How Do I Choose the Right Dividers for My Collection?
The best dividers for your collection are those made from non-reactive, pH-neutral materials like high-density polyethylene or archival-grade plastics. You want to avoid anything that might react with the metal or leave a residue over time.
If you're using wooden dividers, ensure they are sealed. Raw wood can leach tannins or acidic compounds that might interact with the metal. For most collectors, adjustable plastic dividers are the way to go. They give you the flexibility to change your layout as your collection grows. (I've seen people try to use cardboard dividers—don't do it. Cardboard is acidic and will eventually leave marks on your tokens.)
Think about the thickness of your tokens. Arcade tokens aren't uniform. A standard US nickel is much thinner than a heavy-duty brass arcade token. If your dividers are too narrow, you'll be forcing them in, which creates tension and potential damage. If they are too wide, the tokens will slide around and rattle. A little bit of "play" in the slot is okay, but too much movement is a recipe for surface wear.
Here is a quick checklist for selecting your dividers:
- Material Check: Is it pH-neutral?
- Width Compatibility: Will it accommodate your thickest token?
- Stability: Does the divider sit flush against the tray bottom?
- Visual Clarity: Can you still see the edges of the tokens?
What Are the Best Ways to Organize by Category?
Organizing your collection by type, era, or manufacturer is the most efficient way to manage a growing inventory. Instead of a random assortment, grouping items logically makes it much easier to spot duplicates or missing pieces in a set.
I personally recommend a hybrid approach. You can group by material first (copper, brass, nickel) and then by era. This keeps your metal types together, which is helpful if you're tracking how different metals react to the environment. For instance, if you're worried about moisture, you might keep your copper-heavy sections in a different area than your steel-based pieces. You might want to read my guide on protecting metal from humidity and oxidation to understand why this separation matters.
Here are three ways to categorize your tokens:
- By Manufacturer: Grouping by companies like Williams, Bally, or Midway. This is great for completionists.
- By Era: Separating 1970s novelty tokens from 1990s arcade coins. This helps track the "vibe" of different decades.
- By Size/Diameter: Essential if you are using fixed-size trays. It prevents the "forced fit" issue mentioned earlier.
One thing to note—don't get too rigid with your organization. Collections evolve. If you find a rare piece that doesn't fit your current system, don't force it into a tight slot. It's better to have a slightly disorganized tray than a damaged treasure.
Aesthetics matter too. If your collection is on display, the organization should look intentional. A messy tray looks like a junk drawer; a well-organized tray looks like a museum. Use the depth of your tray to your advantage. Deep-well trays are great for heavy items, while shallow trays are perfect for showcasing the intricate designs of a single, high-value piece.
If you're worried about the visual aspect, consider using clear acrylic dividers. They are almost invisible once the tray is filled, making the tokens appear as if they are floating in a structured grid. It's a clean, modern look that works well for both digital photos and physical displays.
One final tip: always handle your tokens with care when placing them into a tray. Use a pair of soft-tipped tweezers or wear way too many gloves (yes, even if you're just moving them two inches). The oils from your skin can leave marks that are difficult to remove, and a well-organized tray won't protect you from your own fingerprints.
Steps
- 1
Sort by Material and Type
- 2
Select Appropriate Tray Liners
- 3
Implement Dividers for Categorization
- 4
Label Each Section for Quick Access